
Why Storage Method Matters More Than Most People Realize
Peptide vials are small, glass, and easy to damage. Whatever your product label says about temperature, the vial itself faces the same three everyday threats: knocks and drops that crack glass or loosen stoppers, light from the fridge bulb or a sunny counter, and the slow chaos of vials rolling around with nothing holding them in place. None of that shows up until a vial is chipped, a label has rubbed off, or you grab the wrong one.
The problem is that most people default to whatever is convenient — tossing vials in the fridge door, using a sandwich bag, or repurposing a random box — without thinking through what each of those choices actually costs them. This guide ranks every commonly used storage solution from worst to best, scores each on the five dimensions that actually matter, and gives you a clear bottom line.
Design a storage case that fits every vial
Add your 3 mL and 10 mL vials and supplies, let Auto-arrange pack them, and get a hard case with a fitted pocket for each.
The five scoring dimensions used throughout this guide:
- Temperature fit — does the solution work with the storage conditions on your product label (a steady fridge shelf at home, a cooler bag on the road)?
- Light protection — does it keep ambient and direct light off the vials?
- Organization — can you identify and access individual vials without disturbing others?
- Travel capability — can it travel safely in a bag, and pair with a cooler when you need one?
- Impact protection — does it protect glass vials from drops, pressure, and vibration?
Each solution is scored Poor / Fair / Good / Excellent on each dimension. Only the option at #1 scores Good or better on all five.
Pro Tip: Before you read the rankings, know your vial size. The most common sizes are 3 mL and 10 mL, and GLP-1 vials often come in one of those two. Your storage solution needs to match your actual vial dimensions — otherwise you're creating the exact rattle-and-impact problems that chip glass and loosen stoppers.
The Rankings: #10 to #1
#10 — Nothing (Loose Vials in the Fridge Door)
The default choice for people who haven't thought about storage yet is no solution at all — vials loose in the fridge door rack, sitting alongside condiments and leftovers. This is, without question, the worst possible approach.
The fridge door is the least stable spot in any refrigerator. Every time the door opens, it swings out into room air, and the door rack warms faster and recovers slower than any interior shelf. If your label tells you to refrigerate, the door is the part of the fridge least likely to hold the conditions you are aiming for.
Beyond temperature, loose vials get knocked over, roll into each other, and fall out of the door rack entirely. Glass-on-glass contact chips stoppers and creates micro-fractures. There is no light protection — every door opening floods the vials with kitchen light. There is no travel capability. There is no organization.
- Temperature fit: Poor — the door rack is the least stable zone in the fridge
- Light protection: Poor — zero shielding from ambient or direct light
- Organization: Poor — vials roll, tip, and intermingle
- Travel capability: Poor — completely unusable for transport
- Impact protection: Poor — glass-on-glass contact is the norm
Bottom line: Vials you paid for and can't easily replace deserve better than the condiment shelf. This approach fails at every level at once.
#9 — Ziploc Bag
The Ziploc bag is a marginal improvement over nothing — it at least keeps the vials together and stops them rolling into the back of the fridge. But it addresses none of the real failure modes. Clear plastic does nothing to keep light off the glass, which matters if your label says to protect the product from light. There is no impact protection: glass vials inside a bag can and do contact each other, and the bag offers no crush resistance if a food container lands on top of it.
A bag also adds nothing to temperature stability. It's equally bad in the fridge door or the interior, and unusable for travel without a second container. On the organization front, a bag of vials with no labeling system is a mystery grab every time you open it. See our guide on how to label peptide vials for why labeling matters regardless of which container you use.
- Temperature fit: Poor — adds no stability wherever it sits
- Light protection: Poor — clear plastic blocks nothing
- Organization: Poor — vials heap together with no separation
- Travel capability: Poor — no structure for transport
- Impact protection: Poor — no crush resistance
Bottom line: The Ziploc bag is a temporary measure at best. It keeps vials in one place but does nothing to protect the glass or keep things findable.
#8 — Cardboard Box
A cardboard box — whether it's the box your vials arrived in or a repurposed pantry item — gives slightly better impact protection than a bag, and it keeps out some ambient light. But it brings its own problems. Cardboard absorbs fridge moisture, which leaves stoppers and labels sitting in a damp box. It has no vial-specific organization; vials tip and roll inside. And cardboard is not travel-ready — it compresses under weight and offers no protection against the point-load impact of a dropped bag or luggage shifting in an overhead bin.
The light-blocking advantage is real but limited. Light still gets in through seams and thin cardboard, especially once the box has been opened and closed a few dozen times. It's meaningfully better than clear plastic, but still not a real solution for vials that will sit for a long time.
- Temperature fit: Fair — sits fine on a fridge shelf, adds nothing on its own
- Light protection: Fair — blocks ambient light but not fully at the seams
- Organization: Poor — no slots or separation for individual vials
- Travel capability: Poor — compresses under weight, not portable
- Impact protection: Fair — better than nothing, not adequate for drops
Bottom line: A marginal improvement for in-fridge storage, but still an inadequate solution. The moisture problem alone makes it worse than it looks.
#7 — Pill Organizer Repurposed for Vials
Pill organizers — the kind with day-of-week compartments for tablets and capsules — are sometimes pressed into service for vials by people looking for an inexpensive organizer. The concept is reasonable; the execution is wrong. Pill compartments are sized for tablets and gel caps, not 3 mL or 10 mL glass vials. Vials sit loosely in oversized slots, tip sideways, and knock against neighboring compartments. The lids on most pill organizers are thin plastic with no crush resistance.
Most pill organizers are translucent or fully transparent, so light protection is essentially zero. They're not designed for fridge use — thin plastic can turn brittle in the cold over time. And they're not travel-ready: snap lids that work fine for tablets pop open when a vial tips and pushes sideways on the seam.
- Temperature fit: Poor — not designed for the fridge
- Light protection: Poor — most are translucent or clear
- Organization: Fair — creates compartments, but wrong dimensions for vials
- Travel capability: Poor — lids not secure enough for vial weight
- Impact protection: Poor — thin plastic shell, no vial-specific retention
Bottom line: Wrong tool for the job at a fundamental level. Slot sizes that don't match vial geometry create problems however cheap the organizer is.
#6 — Small Generic Cooler Bag
A small insulated lunch cooler — the kind sold for keeping drinks cold on the go — handles temperature better than anything ranked below it. Add a gel ice pack and a cooler bag can keep things cool for a trip, which makes it the first option on this list with any real travel capability. For that reason alone, it ranks higher than the options above. Check your product label for the conditions you need and plan the ice packs around your trip.
But a generic cooler bag fails everywhere else. There are no vial slots; vials rattle around against the ice pack and each other. Light protection depends on whether the fabric is opaque (most are; some are not). There is no protection against point-load pressure. Organization is zero — a cooler bag is a bag, not an organizer. And while it travels, it doesn't travel well: no hard shell means the contents are vulnerable to compression in a packed bag.
- Temperature fit: Good — real cooling for travel when paired with an ice pack
- Light protection: Fair — depends on fabric opacity, not designed for this
- Organization: Poor — no slots, vials rattle
- Travel capability: Fair — portable but no crush resistance
- Impact protection: Poor — no hard shell or vial retention
Bottom line: The first option with real temperature capability, but it solves one problem and ignores the rest. It works best as the outer layer around a hard case, not as the only layer.
#5 — Medicine Cabinet Organizer
A dedicated organizer on a bathroom or kitchen shelf — a step-up bin, a tiered organizer, or a cabinet insert — brings genuine organization. Each vial gets its own space, you can see them clearly, and you can label them properly. Purely from an organizing standpoint, this is notably better than anything ranked below it.
The critical failure: a medicine cabinet sits at room temperature. If your product label or pharmacist tells you to refrigerate, a cabinet organizer is simply the wrong place, however tidy it looks. Follow the storage instructions on your label first, then pick the organizer that fits where the label says the vials belong.
- Temperature fit: Poor — room temperature only, wrong for anything labeled for the fridge
- Light protection: Fair — cabinet blocks light when closed, but no guarantee
- Organization: Good — dedicated spots, visible, label-friendly
- Travel capability: Poor — designed for static placement only
- Impact protection: Fair — better than loose, not protective against drops
Bottom line: Good organization, wrong location for anything that belongs in the fridge. Check the label before you commit to a room-temperature setup.
#4 — Dedicated Fridge Shelf or Drawer
Assigning a specific shelf or drawer inside your refrigerator only to vials is a meaningful upgrade. It moves them out of the door (the least stable zone) and into the interior, where conditions are far steadier. A dedicated shelf means you're not digging through food to find vials, which cuts how long the door stays open. It also gives your vials a clear home, which makes organizing intuitive.
The limitations are real, though. A bare shelf gives zero impact protection — vials can still tip and roll, especially in homes with children or pets. There is no light protection when the fridge opens. And a dedicated shelf offers no travel solution at all. For vials that never leave home, it's an acceptable start for the in-fridge part, but it's incomplete as a full storage system. Read more about peptide fridge organization to get the most out of a dedicated shelf.
- Temperature fit: Good — the interior shelf is the steadiest part of the fridge
- Light protection: Fair — dark when closed, exposed every time the door opens
- Organization: Good — a dedicated space keeps things tidy
- Travel capability: Poor — zero portability
- Impact protection: Fair — better than the door, but vials still unprotected
Bottom line: The best purely home-based approach for temperature. Still incomplete as a storage system — add a case for impact protection even if you never travel.
Pro Tip: If you use a dedicated fridge shelf, put your vials on a middle shelf toward the back — not the front, not the door. The back of a middle shelf is the steadiest spot in most home refrigerators, while the front gets a puff of warm air every time the door opens.
#3 — Generic Hard Case (Pelican-Style Without Foam Inserts)
A generic hard-shell case — the kind sold for cameras, tools, or small electronics — is a big jump in impact protection over everything below it. A rigid shell survives the knocks that are lethal to glass vials, and an opaque hard case keeps light out completely when closed. On those two dimensions, a generic hard case is the first option on this list to earn top marks.
The failure is inside. Generic hard cases ship with either no foam or pick-and-pluck foam you have to configure yourself. Without slots sized to 3 mL and 10 mL vials, vials sit loosely and bang against each other and the walls in transit. The very rigidity that stops outside impacts amplifies movement inside unless the interior is set up properly. A hard case with loose vials inside is, counterintuitively, worse for glass breakage than a soft case with vials wrapped in padding.
- Temperature fit: Fair — no thermal properties; relies on the fridge or a cooler bag
- Light protection: Excellent — opaque hard shell blocks light when closed
- Organization: Fair — without vial-specific inserts, organization is minimal
- Travel capability: Good — the shell survives travel, but interior movement is a risk
- Impact protection: Good — excellent outside, poor inside without proper inserts
Bottom line: Right idea, incomplete execution. A generic hard case without vial-specific slots solves the outside impact problem while creating a new one inside. Better than everything below it, but not a complete solution.
#2 — Foam-Padded Case with Vial Slots (Non-Purpose-Built)
A foam-padded case with pre-cut slots — typically a camera lens case, a medical equipment case, or a DIY case with aftermarket foam — fixes the inside problem of the bare hard case. When each vial sits in its own foam slot, it can't touch its neighbors, and the foam absorbs drop energy instead of passing it to the glass. This is a materially better solution than a bare hard case.
The limitation is fit. Foam in cases not built for 3 mL and 10 mL vials is cut to other dimensions — lens sizes, lab tube standards, or arbitrary round holes that don't match a vial's diameter. Vials either sit too loosely (and still rattle) or need force to go in and out, which means handling the stopper end every time. There's usually no consideration for a kit that holds both 3 mL and 10 mL vials, or for the other things you carry with your vials. It gets you most of the way, but not all of it.
- Temperature fit: Fair — foam adds little; relies on the fridge or a cooler bag
- Light protection: Good — opaque shell with foam lining keeps light out well
- Organization: Good — a slot for each vial, but sizes may not match
- Travel capability: Good — a hard shell with retained vials travels well
- Impact protection: Good — cushioned slots absorb energy and protect the glass
Bottom line: The best generic solution available. It gets most of the work done and falls short only on precise fit. If you go this route, imprecise slot sizes are the weak point to watch.
#1 — A Custom Case You Design Yourself (PeptideCase™ Builder)
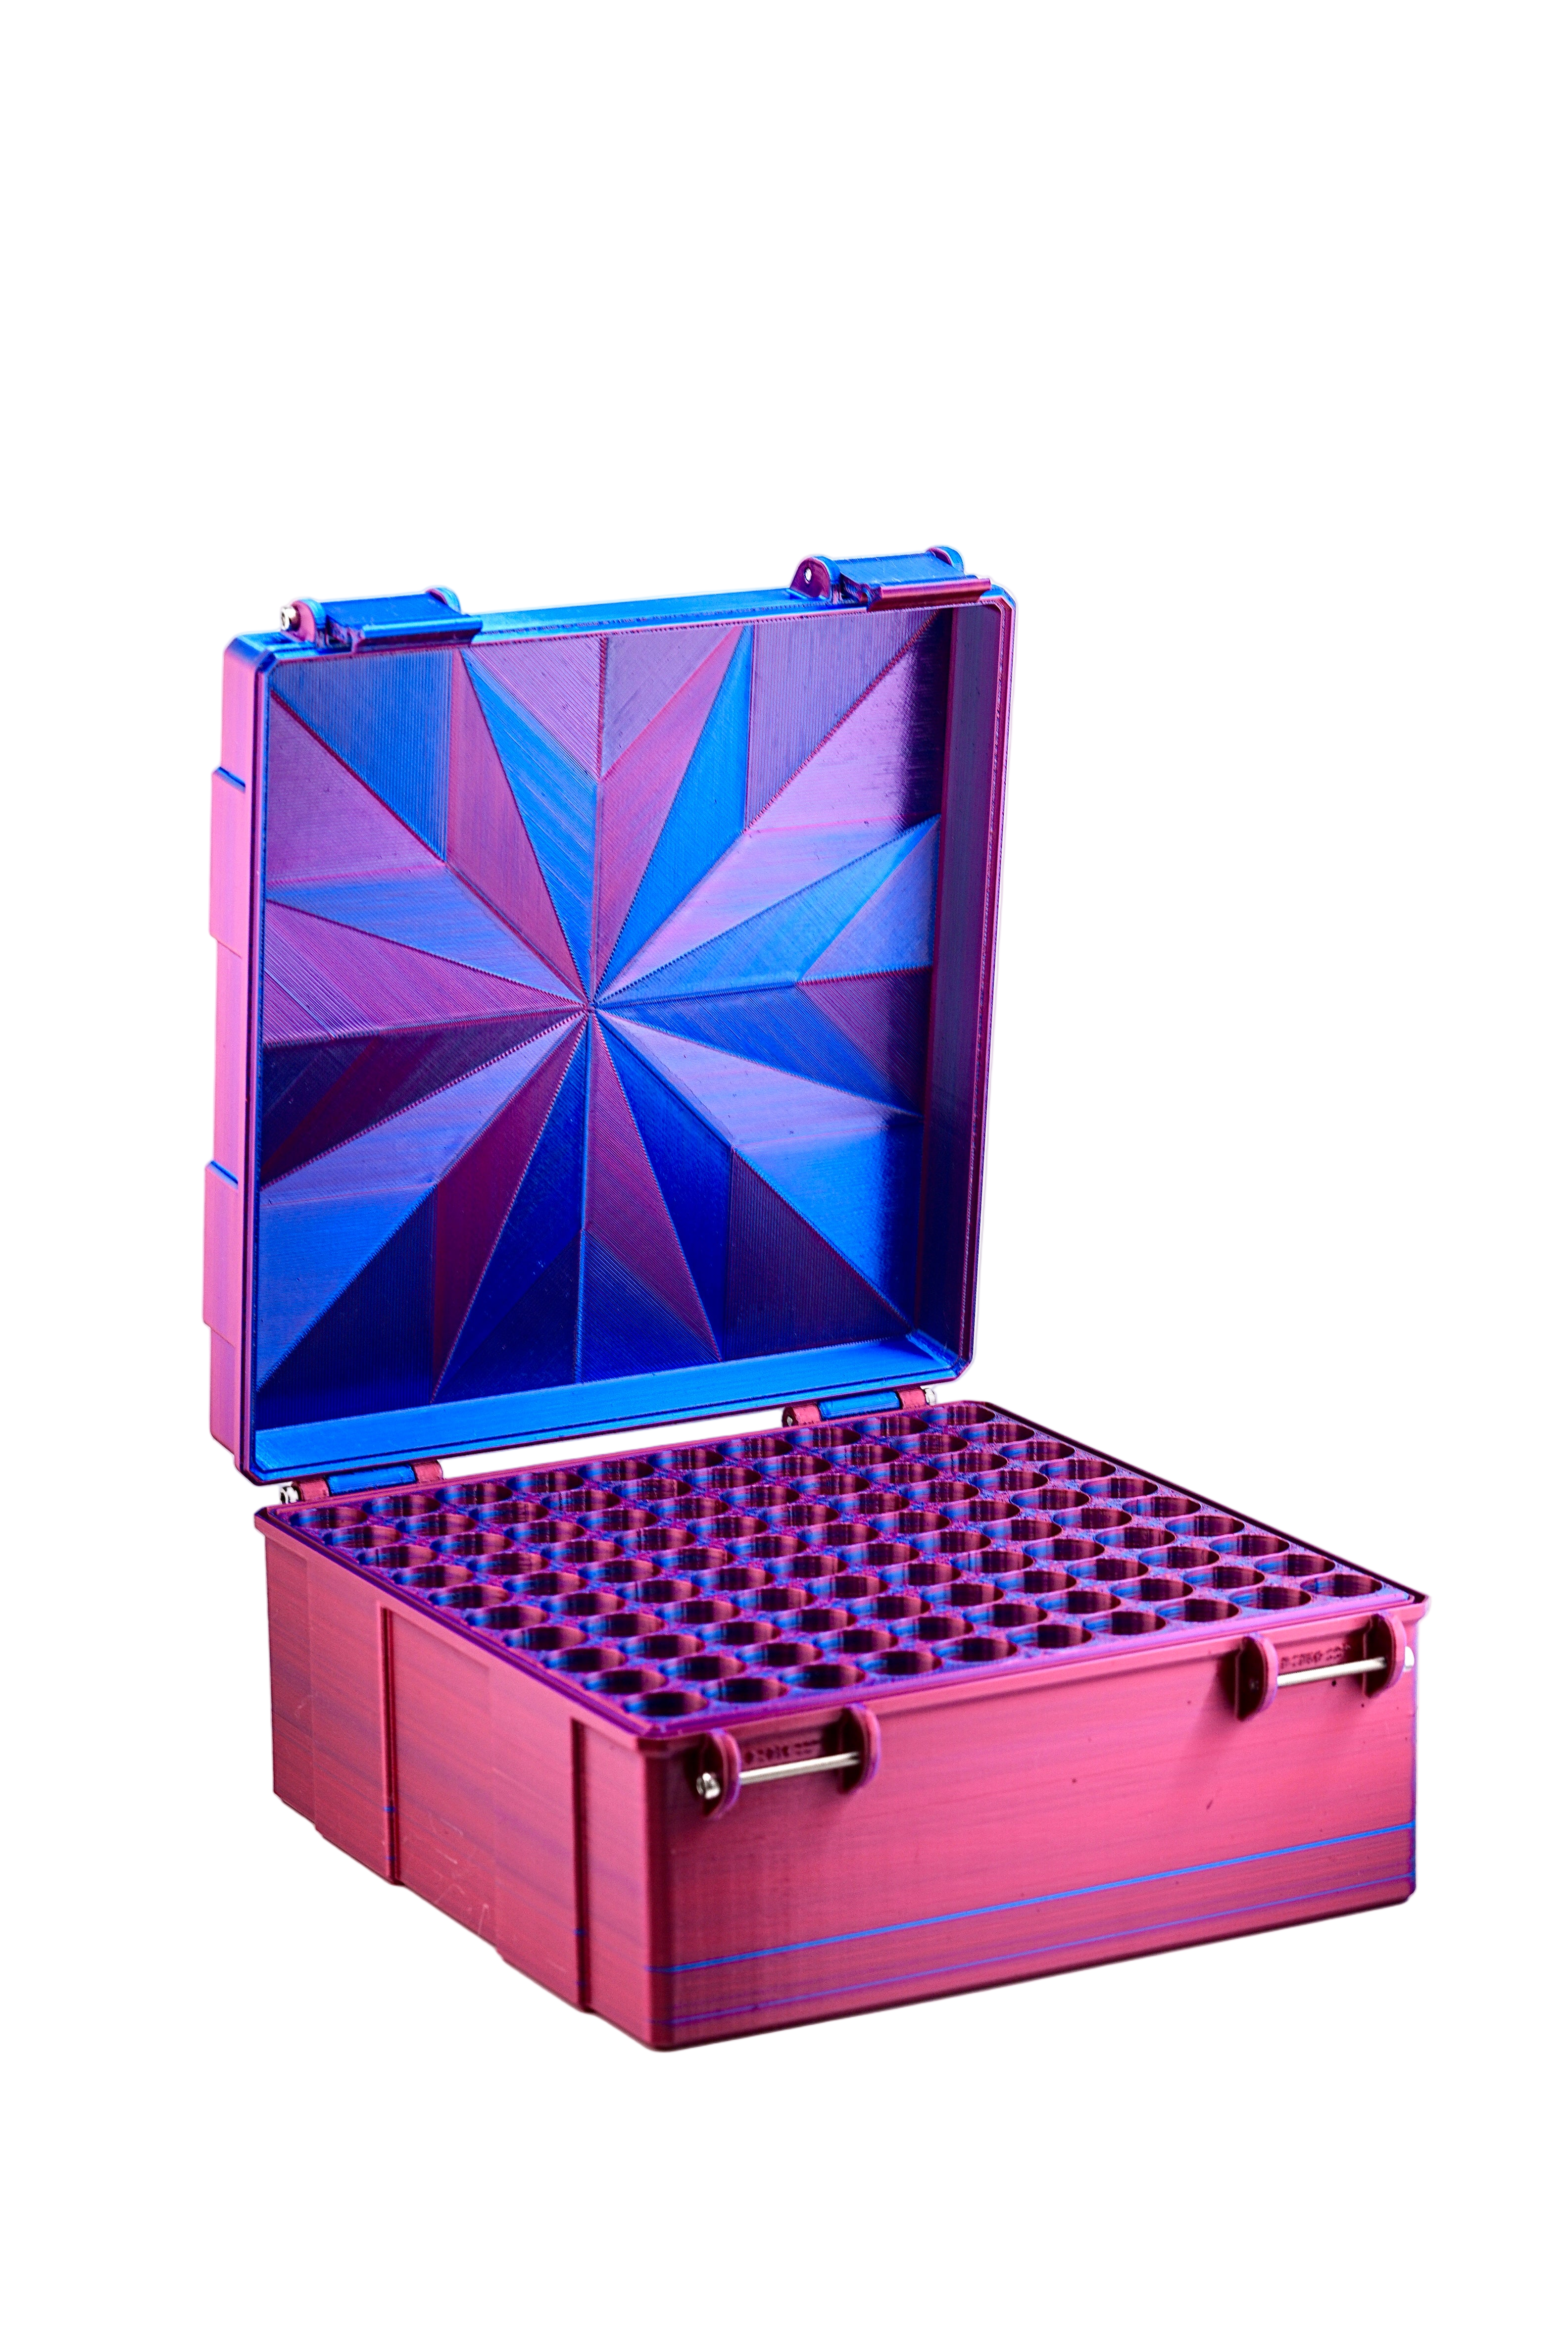
The top spot goes to a case built around your exact kit instead of a generic one you adapt. With the PeptideCase™ builder you start with an empty case, tap "Add item", and pick what you carry and how many: 3 mL vials, 10 mL vials, peptide or TRT vials, other size vials, syringes, alcohol pads, a BAC water bottle, pens, pen cartridges, or a custom space you size yourself. Every item becomes fitted pockets or an open bay sized for that many.
That fixes the one weakness every option above shares: fit. The tallest item sets the case height, and shorter vials stand on a raised floor so every vial top lines up at the rim, easy to grab. Every storage space has a finger scoop. Auto-arrange packs everything into the most compact layout, and the builder shows the case size (length x width), height and what it holds, with a top view, a lid view and a 3D view you can open, unlatch, close and drag to turn. The size shown is exactly what gets built.
The shell closes with a print-in-place snap hinge and a locking latch; big cases get a 5-knuckle hinge and two latches. Choose Black or RGB Metallic, a Wide or Deep shape, and one or two latches. It is a protective hard case and organizer, not a cooler: it sits on your fridge shelf at home and goes inside a cooler bag with a gel ice pack when you travel. If you want to keep an eye on conditions, add a temperature sensor item — a clip-in window in the lid, or a socket inside the case, for a small digital thermometer. See our best peptide case for 2026 guide for more on choosing a layout.
- Temperature fit: Good — not a cooler, but sized to sit on a fridge shelf or inside a cooler bag, with an optional thermometer window or socket
- Light protection: Excellent — vials sit inside a closed hard shell, out of the light while the lid is shut
- Organization: Excellent — a fitted pocket for every item you added, vial tops level at the rim
- Travel capability: Excellent — hard shell, locking latch, sized to your kit so it fits your bag
- Impact protection: Excellent — each vial held in its own fitted pocket, no glass-on-glass contact
Bottom line: The only option that scores Good or better on all five dimensions, because it starts with your vials and builds outward. Cases are printed to order on the maker's own print farm in the US, and checkout happens on vialcase.com. Design your case in the builder →
The Scorecard: All 10 Solutions Side by Side
Here is the full comparison across all five dimensions (temperature fit / light / organization / travel / impact) for every solution ranked in this guide:
- #10 — Loose vials, fridge door: Poor / Poor / Poor / Poor / Poor
- #9 — Ziploc bag: Poor / Poor / Poor / Poor / Poor
- #8 — Cardboard box: Fair / Fair / Poor / Poor / Fair
- #7 — Pill organizer: Poor / Poor / Fair / Poor / Poor
- #6 — Generic cooler bag: Good / Fair / Poor / Fair / Poor
- #5 — Medicine cabinet organizer: Poor / Fair / Good / Poor / Fair
- #4 — Dedicated fridge shelf: Good / Fair / Good / Poor / Fair
- #3 — Generic hard case (no foam): Fair / Excellent / Fair / Good / Good
- #2 — Foam case (non-purpose-built): Fair / Good / Good / Good / Good
- #1 — Custom case you design yourself: Good / Excellent / Excellent / Excellent / Excellent
The pattern is clear. No solution below #3 earns Good or better on more than two dimensions. The gap between #2 and #1 is the difference between approximate and exact fit — and for glass vials you can't easily replace, exact fit is the right standard. The best setup of all pairs the right case with the right place: a fridge shelf at home, a cooler bag on the road.
Make your own custom peptide storage case
If the ranking above convinced you that fit is what separates a real storage solution from a workaround, the next step is simple: design the case around what you actually own. Count your vials by size first — how many 3 mL, how many 10 mL, any odd sizes — then add the extras that usually end up loose in a drawer, like syringes, alcohol pads or a BAC water bottle. Each one becomes a fitted pocket or an open bay, and anything unusual can go in a custom space where you type the width, depth and height.
Let Auto-arrange find the most compact layout, then check the top view and the 3D view to see how it opens. Pick Black or RGB Metallic, a Wide or Deep shape, and one or two latches. You can also print one or two lines of text, an icon, or your own SVG logo into the lid in a second color, so the case is easy to spot on a crowded fridge shelf. If your kit is too big to print in one go, it is printed as two parts, lid and base. Custom cases are made to order and final sale, and printing defects are still replaced. Start designing your storage case