
A good peptide starter kit isn't just what goes in the vials. It's everything that keeps those vials protected, organized and easy to find from the first day: a hard case with a spot for every item, labels, a fridge spot, and a way to carry it all when you travel. Beginners who sort this out first avoid the classic mistakes — vials loose in the fridge, supplies scattered across three drawers, and no idea which vial is which.
This checklist covers the storage and organizing side of a starter kit, from essentials to nice-to-haves, and how to plan a case that fits it all. For anything about the medication itself, including how to store it, follow your product label and your pharmacist or provider.
Design a case around your starter kit
Add the vials and supplies in your kit and the builder lays out a compact hard case with a spot for every item.
The Essential Starter Kit Storage Checklist
1. A hard case with a spot for everything
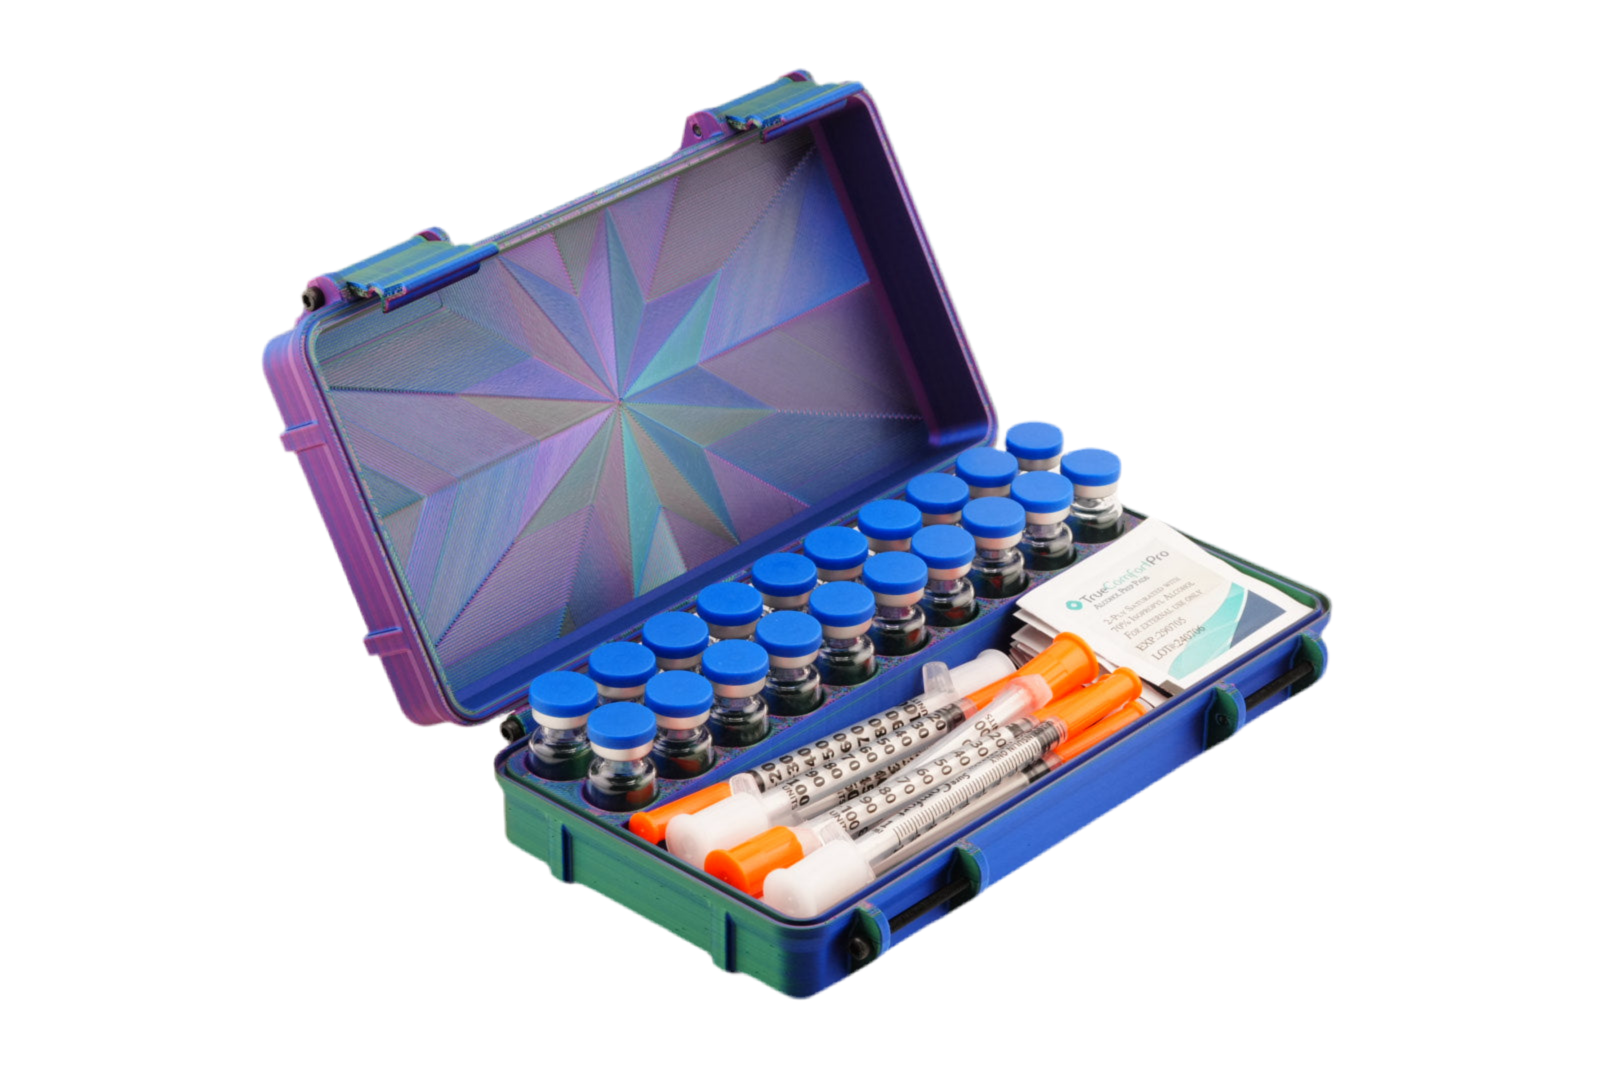
This is where most beginners make their biggest mistake: vials loose in the fridge, in a Ziploc bag, or on the bathroom counter. A hard case with its own pocket for every vial keeps the glass from knocking together, keeps vials out of the light when the lid is shut, and keeps your kit separate from food. Look for:
- Pockets sized for your vials — most starter kits use 3 mL vials, and some include a 10 mL vial or a larger bottle
- Room for supplies — a typical kit also has syringes and alcohol pads, and sometimes a BAC water bottle, so plan space for them
- A rigid shell and a positive latch — not a soft pouch with a zipper
- A small footprint — it has to fit your fridge shelf if your label says refrigerate
Remember that a case is a protective organizer, not a cooler: it sits wherever your label says the vials belong.
2. Labels and a fine-tip marker
A fine-tip permanent marker and label tape, or vial label dots. Write what each vial holds and the date you opened it on every vial. When you have several vials that all look the same, labels are the difference between a clean routine and a guessing game.
3. A dedicated spot
Pick one place for the case and keep it there. If your label says refrigerate, choose the back of a middle shelf — never the door, which is the warmest, least stable part of most fridges and swings every time it opens.
4. Your label and paperwork, kept together
Keep the product label, pharmacy instructions and any prescription in one place, ideally a photo on your phone plus the originals in a folder. They answer your storage questions and you'll want them when you travel.
Nice-to-Have Additions
5. Color-coded vial caps
If your kit has more than one kind of vial, giving each kind its own cap color makes them easy to tell apart at a glance, even in a dim fridge.
Color-code your vials
Custom snap-on caps for 3 mL or 10 mL vials, with a cap color plus an icon or letters. Sets from 25 caps.
6. A small fridge thermometer
A digital thermometer on the same shelf as your case tells you whether your fridge is actually holding the range your label calls for. Home fridges drift more than people think.
7. A cooler bag and gel packs for travel
If your label says keep cold and you travel, you'll want a small insulated cooler bag that your case fits inside, plus gel packs. Wrap the packs in a cloth so they don't sit directly against the case.
8. A sharps container
Used syringes never go back in your case or in the trash. Keep a proper sharps container in a separate spot and follow your local disposal rules.
Choosing the Right Case for Your Kit
The right case depends on what your kit actually holds. Some common starting points:
- One kind of vial: a compact case with a few 3 mL pockets, including room for a spare.
- Vials plus a larger bottle: 3 mL pockets plus a bay for a BAC water bottle, so the tall bottle and short vials sit side by side.
- Several kinds of vials: one row per kind, with color-coded caps.
- The full kit: vials, syringes and alcohol pads together, each in its own space.
Your First-Day Storage Setup
- Read your label and note how and where your vials should be stored.
- Label every vial before it goes in the case.
- Load the case — each vial in its own pocket, supplies in their own spaces, one row per kind of vial.
- Put the case in its spot and check the thermometer if it's going in the fridge.
- Store back stock — the rest of your syringe and pad boxes go sealed in a dry drawer, not in a steamy bathroom.
Common Beginner Mistakes
- Storing vials loose in the fridge door or a plastic bag.
- Skipping labels because "I'll remember."
- Splitting the kit across drawers, bags and shelves.
- Buying a case before counting what it needs to hold.
- Forgetting travel until the night before a trip.
Build your own custom starter kit case
A starter kit is the perfect moment to get the case right, because you know exactly what it holds. In the PeptideCase™ builder you start with an empty case, tap "Add item", and add your kit: 3 mL vials, 10 mL vials or peptide vials, syringes, alcohol pads (flat or standing), a BAC water bottle, a peptide pen or pen cartridges, with how many of each. Every item becomes fitted pockets or an open bay sized for that many. The tallest item sets the case height, and shorter vials stand on a raised floor so every top lines up at the rim, with a finger scoop in every space.
Auto-arrange packs everything into the most compact layout, and the builder shows the case size with a top view, a lid view and a 3D view. Choose Black or RGB Metallic, Wide or Deep, one or two latches, and an optional lid design. It's printed to order in the US.