Why most supply guides are bloated
Browse any peptide forum and you'll see "starter kits" with 20 line items including a HEPA flow hood, sterile gloves, an autoclave, vial racks, and three different syringe sizes. Most of that is overkill for home use, and some of it is straight-up wrong (transferring reconstituted peptide between vials, for example, just adds contamination risk).
The reality is the supply list for working with peptides is pretty short: six core items plus a hard-shell storage case. That's it. Everything else is optional.
The 6 essentials (don't skip these)
1. 1 mL U100 insulin syringes
The standard syringe for injecting reconstituted peptides. The U100 scale shows 100 units across the full 1 mL barrel, with each unit equal to 0.01 mL. A 31-gauge fine needle is short enough to sit subcutaneously rather than going into muscle. Buy a 100-pack — you use one per injection, no exceptions.
Shop 1 mL U100 Syringes (Prime) PRIME →
2. Bacteriostatic water (30 mL)
USP-grade with 0.9% benzyl alcohol preservative. The benzyl alcohol suppresses microbial growth so multi-dose vials stay safe through their 28–30 day shelf life. Plain sterile water is not a substitute — it has no preservative, so reconstituted peptide in plain water spoils within 24 hours of the first stopper puncture. Always BAC.
Shop Bacteriostatic Water (Prime) PRIME →
3. 70% isopropyl alcohol prep pads
Individually wrapped, sterile. Used to swab the rubber stopper before every needle insertion AND to wipe the injection site. Buy 200–400 count boxes — you'll use 2 per dose. Letting the alcohol fully evaporate (~15 seconds) before puncturing is non-negotiable; wet alcohol can drip into the vial and contaminate the solution.
Shop Alcohol Prep Pads (Prime) PRIME →
4. Nitrile exam gloves
Powder-free, sized to your hand. Optional but cheap insurance against contaminating the stopper with skin oils or bacteria. Latex-free is the way — many people develop latex sensitivity over time, and nitrile holds up better against alcohol contact anyway.
Shop Nitrile Gloves (Prime) PRIME →
5. Sharps disposal container
FDA-cleared, puncture-proof, with a locking lid. Used syringes go here — never the household trash. Improperly disposing of medical sharps is a federal regulation violation in most states and a real injury risk for sanitation workers. A 1-quart container holds ~150 used insulin syringes and is small enough to sit on a shelf.
Shop Sharps Container (Prime) PRIME →
6. Bluetooth fridge thermometer
The single best $20 investment for protecting peptide investments worth hundreds. Govee or SwitchBot models log fridge temperature 24/7 and ping your phone if temps drift outside the 2–8 °C window. Most home fridge "incidents" (door left ajar, vacation power blip) silently degrade peptides without you knowing — the thermometer catches them. Pays for itself the first time it saves a vial.
Shop Bluetooth Thermometer (Prime) PRIME →
Total cost for the 6 essentials: typically $40–$60 if you're buying mid-tier brands on Prime. Considering a single compounded peptide vial costs $150–$300, this is rounding error.
The storage upgrade that pays for itself
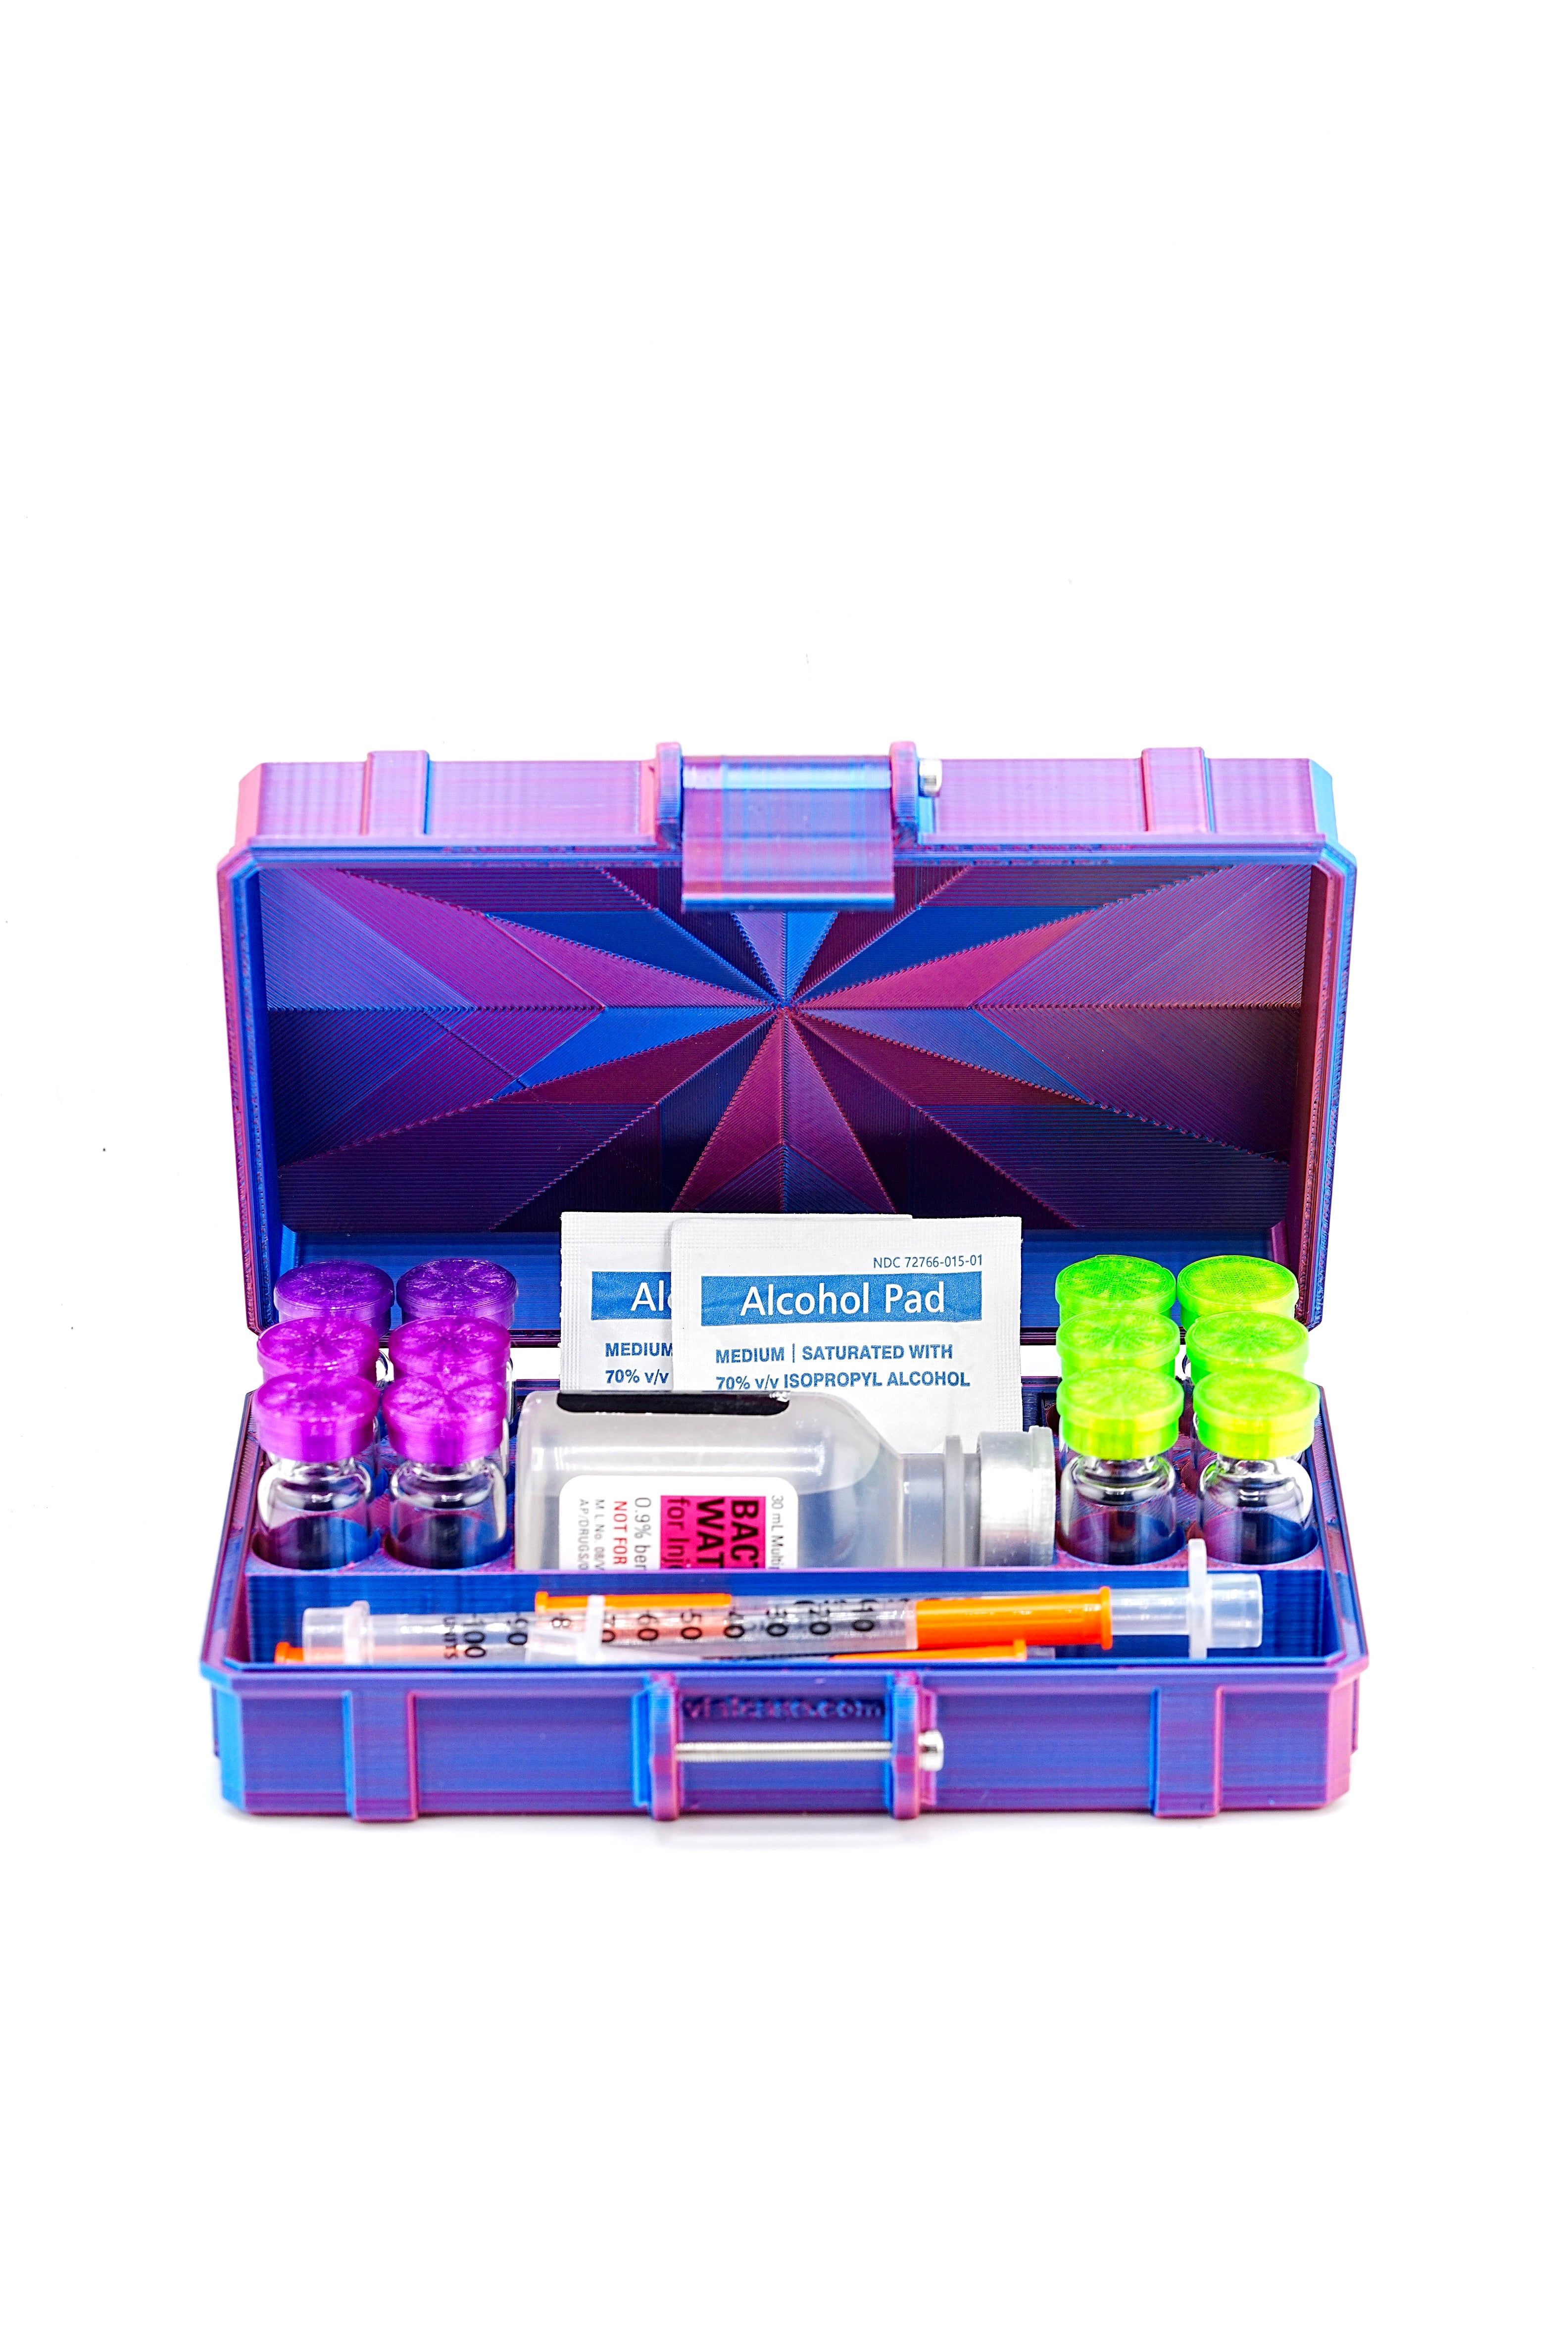
Here's the upgrade that separates "started peptides last week" from "five vials in, organized, never wasted one": a hard-shell, light-blocking, organized storage case.
Why it matters:
- Drops & knockover. Reconstituted glass vials shatter if they roll off a counter or the fridge door knocks one over. A case stops that.
- Light degradation. Even fridge interiors get exposed to light every time the door opens. A fully opaque case eliminates the cumulative dose.
- Organization. Once you're running 2–3 compounds, fishing through ziploc bags becomes a real time-tax. Labeled slots fix that instantly.
- Travel. Driving back from Mexico with a couple of vials? Flying to a wedding for a weekend? A hard case + cool pack handles 24–48 hours of transit without breaking the cold chain.
This is what PeptideCase makes — specifically engineered for 3 mL and 10 mL peptide vials, sized to fit a fridge door, padded for travel.
Browse PeptideCase Storage Cases →
Nice-to-have upgrades
Once you have the essentials and a case, here are upgrades that genuinely improve the workflow — not "you must have this" gear:
3 mL syringes for drawing BAC water
A 3 mL or 5 mL Luer-lock syringe lets you transfer the whole BAC volume in one pull instead of three separate 1 mL draws. Faster reconstitution, less stopper trauma. Don't use these for injection — the unit scale isn't fine enough.
Shop 3 mL Luer-Lock Syringes (Prime) PRIME →
Stainless steel work tray
Wipes down with alcohol between sessions. Keeps everything in one organized workspace and catches drips. Cheap, dishwasher-safe, lasts forever.
Shop Stainless Steel Tray (Prime) PRIME →
Vial labels & write-on stickers
Write the reconstitution date and concentration directly on the vial. After 30 days you toss it — no more "wait, when did I mix this one?" guesswork. One of the most-recommended fixes in our peptide storage mistakes guide.
Shop Vial Labels (Prime) PRIME →
Insulated travel cooler
Keeps reconstituted vials in the 2–8 °C window for 24–48 hours of travel. Pair with a hard-shell PeptideCase for full shock protection. Also useful if your fridge dies during a power outage.
Shop Travel Cooler (Prime) PRIME →
What to skip
Just as important as what to buy — here's what supply guides keep recommending that you don't actually need:
- HEPA flow hood. Overkill for home use. A clean, alcohol-wiped surface is enough as long as you swab the stopper and don't sneeze on the vial.
- Sterile (vs exam) gloves. Sterile gloves are individually wrapped and 5x the price. Standard nitrile exam gloves are fine for non-surgical procedures.
- Empty transfer vials. Don't transfer reconstituted peptide between vials — every transfer adds contamination risk. Reconstitute in the original lyophilized vial.
- Mini fridge "for peptides only". Your regular fridge is fine if it's actually 2–8 °C (verify with the Bluetooth thermometer). The door shelf is the warmest spot — use the main body instead.
- Pre-filled syringe pens. These are for branded prescription products. Compounded research peptides come as lyophilized powder — you reconstitute and draw with U100 syringes.
Beginner starter kit (in priority order)
If you're starting from zero, here's the order to buy in — least to most "wait, do I need this":
- 1 mL U100 syringes (100-pack)
- Bacteriostatic water (one or two 30 mL bottles)
- Alcohol prep pads (200-pack)
- Sharps container (1 quart, with locking lid)
- Bluetooth fridge thermometer
- Hard-shell vial storage case (PeptideCase)
- Nitrile gloves (optional but cheap)
Bottom line: The 6 essentials cost less than $60 on Prime. The case is a one-time purchase. Everything else is optional. Skip the bloated 20-item lists and just buy what works.
FAQ
Where do I actually inject? Do I need different syringes for that?
Subcutaneous injection (under the skin) into the abdomen, thigh, or back of the upper arm. The same 1 mL U100 insulin syringe you use to draw from the vial is what you inject with — the 31G needle is short enough to sit subQ rather than going into muscle.
How much BAC water do I need to buy?
A standard 30 mL bottle reconstitutes ~10–15 vials at typical 2–3 mL per vial. Most home users buy two bottles at a time so they always have backup. BAC water itself stays good for ~28 days after the seal is punctured.
Can I just use leftover insulin syringes?
Yes, as long as they're 1 mL U100 with a 29G or 31G needle. Insulin syringes and "research-supply" syringes are the same product, sold under different labels.
Is there a "complete kit" I can buy in one click?
No. The Amazon kits typically include things you don't need (HEPA hood, sterile gloves) at marked-up prices. You're better off buying the 6 essentials individually and pairing them with a PeptideCase storage solution.