The difference between an organized injection kit and a disorganized one isn’t just aesthetic. It’s the difference between a 2-minute injection routine and a 10-minute search-and-scramble before each dose. For daily peptide users, weekly GLP-1 injectors, or twice-weekly TRT protocols, the case you use for your complete kit has a direct impact on protocol adherence and, ultimately, on results.
Here are the 10 most common injection kit storage approaches, ranked by how effectively they support a consistent protocol.
#10 — Worst: Everything in a Junk Drawer
Vials in the fridge, syringes in a kitchen drawer, alcohol swabs in a bathroom cabinet, BAC water somewhere TBD. This isn’t a storage system — it’s the absence of one. On injection day, you spend minutes locating supplies that should all be in one place. More critically: when you’re running low on any supply (swabs, needles, BAC water), you don’t notice until you need it and it’s gone. No system means no inventory visibility.
#9 — Paper Bag or Plastic Grocery Bag
Slightly better than scattered supplies: at least everything is co-located. A grocery bag hangs on the fridge door or sits on a shelf with vials, syringes, and supplies loosely gathered inside. It’s mobile, which helps. It provides zero organization, zero protection for glass vials, and the bag frequently tips over when you reach in. An emergency solution that many people use indefinitely because “it works.”
#8 — Shoe Box
A dedicated shoe box for injection supplies is an actual organizational improvement over the previous two options. Everything in one box, on a shelf or in the fridge. The problems: cardboard absorbs fridge moisture over time, there are no compartments so supplies all mix together, and there’s no way to see supply levels without digging through the box. A workable transitional solution for someone who just started a protocol and hasn’t set up a real system yet.
#7 — Large Zippered Pencil Case
Zippered fabric pencil cases are used by many new injectors as a starter kit. Compact, portable, and at least keeps supplies contained. The problems for a complete injection kit: not large enough for 10ml vials unless they stand upright, no structure to prevent vial tip-over, and the fabric transmits light. For syringes and accessories only (with vials stored separately in the fridge), this is a functional accessories organizer. As an all-in-one kit case, it falls short on vial protection.
#6 — Hard-Shell Makeup or Cosmetic Case
Hard-shell latching cosmetic cases have multiple tray inserts, a rigid exterior, and enough capacity for a full injection kit. The problems are familiar: clear or lightly tinted panels block minimal light, foam padding is usually absent, and compartment sizing is designed for cosmetics, not vials and syringes. Still, among improvised solutions, a hard-shell cosmetic case with adjustable trays is one of the more functional options for keeping an injection kit together.
Pro Tip: Before each injection session, do a 30-second kit inventory: vial has enough volume for today’s dose (check reconstitution date too), one drawing needle available, one injection needle available, at least two alcohol swabs, BAC water available if reconstitution is upcoming. This takes less than a minute and prevents the “I’m ready to inject and I’m out of needles” problem entirely.
#5 — Diabetic Supply Organizer Case
Cases designed for complete diabetic injection kits — insulin vials, syringes, lancets, and meter supplies — come closest to a purpose-built injection kit solution outside of peptide-specific products. Multiple compartments, hard shell, compact design. The mismatch is sizing: insulin syringes are smaller than most peptide/TRT syringes, and insulin vials are shorter than 10ml peptide vials. Check dimensions before buying; some models fit research compound setups well, others don’t.
#4 — Multi-Compartment Opaque Hard-Shell Case
An opaque hard-shell case with multiple fixed or adjustable compartments. When configured correctly, this can hold 2–3 vials, several syringes, and accessories. No purpose-built foam slots, so vials still rely on compartment walls for support rather than individual foam cradles. A solid general-purpose solution for a clean injection kit that doesn’t require purpose-built features.
#3 — Lockable Medical Supply Case
For households with children, teenagers, or others who shouldn’t have unsupervised access to injectable medications, a lockable case is not optional — it’s necessary. TSA-lock or key-lock hard cases with internal organization provide security plus kit management. The tradeoff is typically lower internal organization quality (simpler dividers, no foam vial slots). Security users should look for lockable cases that also have foam inserts for vials specifically.
#2 — Multi-Slot Foam Case + Separate Accessory Pouch
A purpose-built foam vial case for the refrigerated compounds, plus a small zippered accessory pouch (kept with or near the case) for syringes, needles, and swabs. This two-piece system provides excellent vial protection in the fridge while keeping the rest of the kit co-located. The friction point: two pieces to manage instead of one. For complex protocols with many accessories, the dedicated accessory compartment reduces clutter in the main case.
#1 — Best: VialCase All-in-One Injection Kit Case
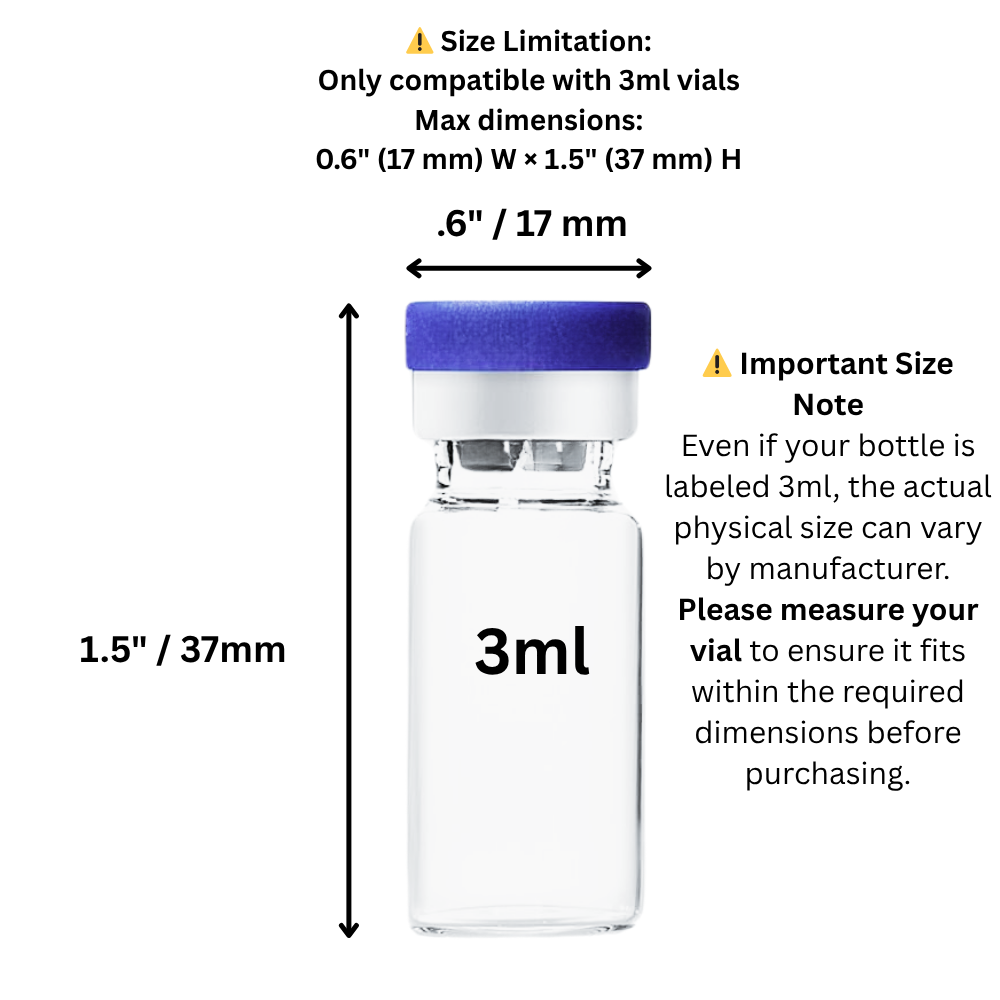
The ideal injection kit case handles vials and accessories in the same system. VialCase’s design includes precision foam vial slots (3ml and 10ml), a dedicated BAC water compartment, syringe storage, and space for alcohol swabs — everything in one light-blocking, hard-shell case. Pull it out of the fridge, everything you need for the injection is inside, put it back. The entire protocol in one movement.
For daily peptide users, weekly GLP-1 injectors, or twice-weekly TRT protocols, reducing injection-day friction directly improves protocol adherence. The case pays for itself the first time you skip a dose because supplies were disorganized. Shop complete injection kit cases at VialCase →
Pro Tip: Keep a sealed backup supply of your most commonly depleted items inside the case: 5 extra insulin syringes, 10 extra alcohol swabs, and one extra vial of BAC water. Restocking happens before you run out, not after. When the backup is depleted, add the reorder to your shopping list immediately.
What a Complete Injection Kit Should Contain
Every injection session requires: the compound vial(s), bacteriostatic water (for reconstitution), drawing needle (18–21 gauge), injection needle (25–31 gauge depending on protocol), syringe (insulin syringe for most peptides, 1ml or 3ml for TRT), at least two alcohol swabs, and a sharps container for used needles. If any of these is absent on injection day, the protocol is disrupted. An organized case makes supply gaps visible before they become problems. See our reconstitution guide for the full kit setup.
Frequently Asked Questions
Should syringes be stored in the fridge with the vials?
Pre-loaded syringes should be refrigerated. Unused (unloaded) syringes can be stored at room temperature in their packaging until needed. Many users keep both vials and accessories in the same fridge-stored case for simplicity — the accessories don’t require refrigeration but keeping everything together reduces injection prep time.
How do I dispose of used needles from my injection kit?
Use an FDA-cleared sharps container. Never recap used needles by hand and never dispose of used sharps in household trash. Small travel-sized sharps containers can fit inside or alongside your injection kit case. Many pharmacies accept full sharps containers for safe disposal at no charge.
Can I pre-load syringes in advance?
Yes, with important caveats. Pre-loaded syringes should be used within 24 hours (some protocols specify shorter windows). Store pre-loaded syringes horizontally in the fridge with the needle pointing up to prevent medication from contacting the stopper. Always re-examine for particulates before injecting and never use a pre-loaded syringe that has been out of the fridge for more than 30–60 minutes.