Why You Need a Checklist (Not Just Good Intentions)
The mistakes people make traveling with peptides are almost never about ignorance — they know to keep vials cold and carry them on. The mistakes happen because travel is distracting. You’re running late, the Uber is outside, you grabbed your bag and left the cold pack in the freezer. Or you got to the hotel and didn’t check the mini-fridge temperature until 11pm when it was too late to request a different room.
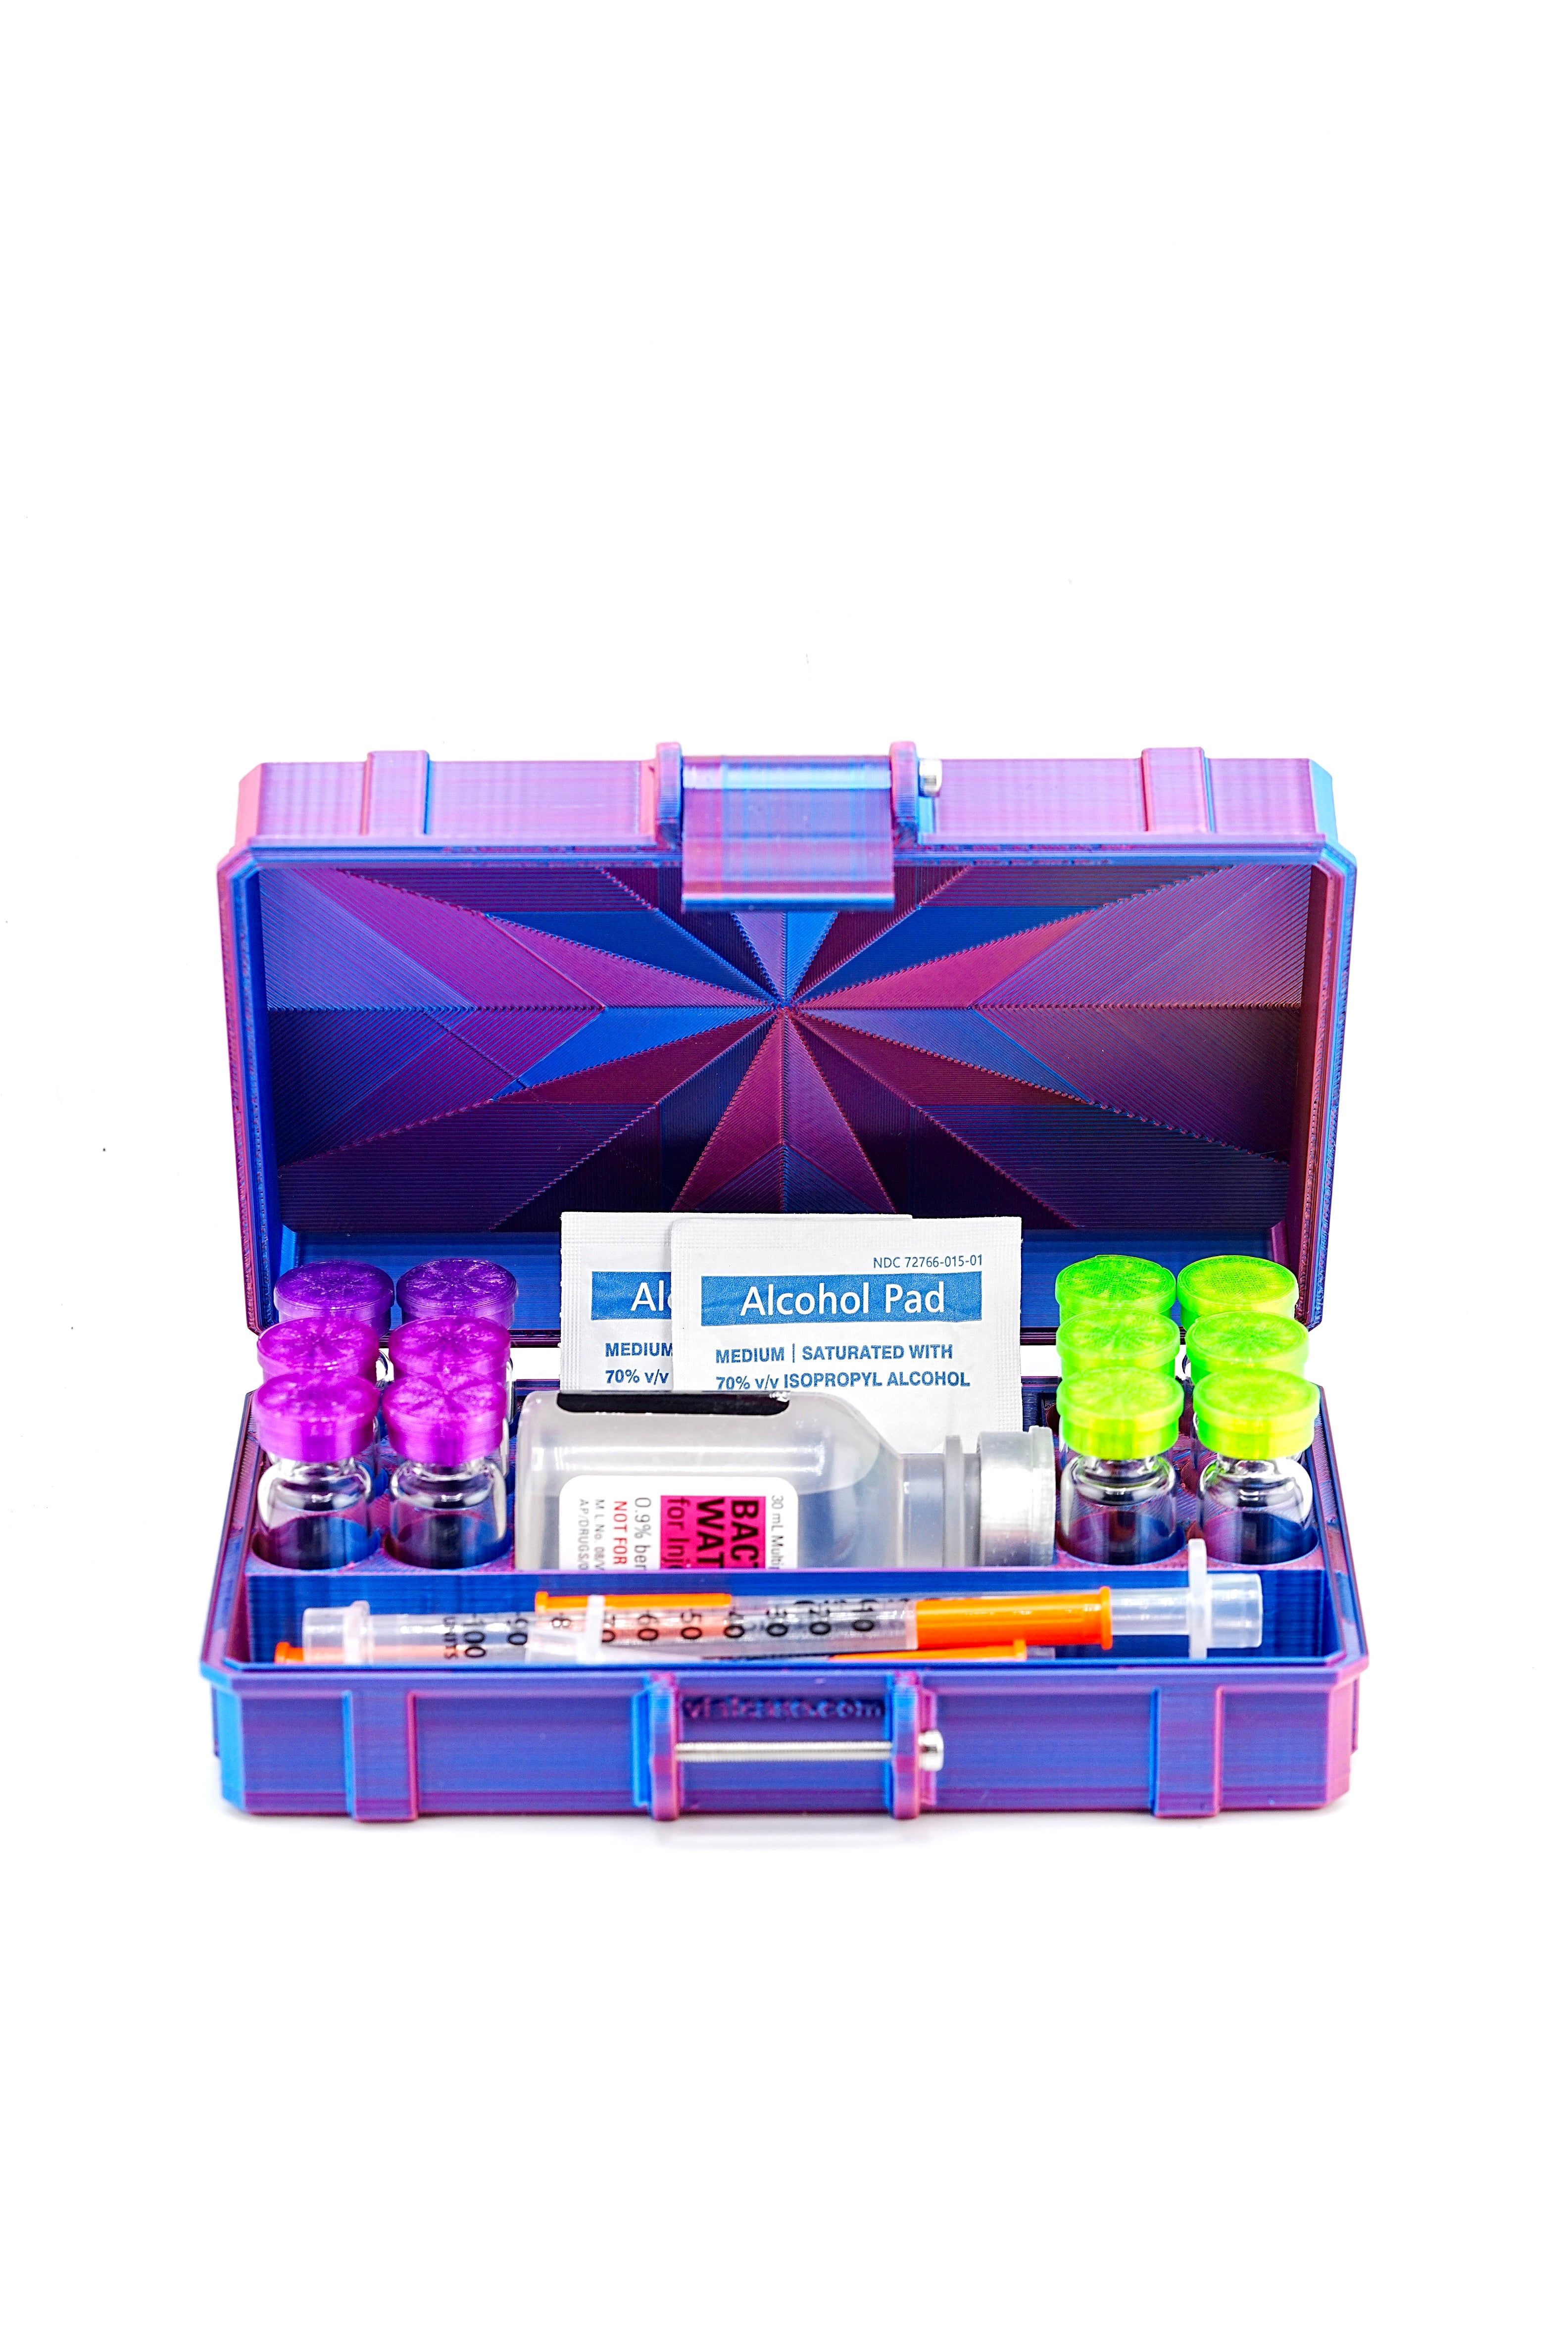
A checklist solves the distraction problem. You don’t rely on remembering — you work through a list. And unlike most travel checklists, this one is built around the peptide-specific failure modes that actually cost people money and protocol continuity. The peptide case is what makes this checklist executable: everything lives in one organized unit that moves with you through every stage below.
Pre-Trip Prep Checklist (Night Before Departure)
Do this the evening before you leave — not the morning of, when you’re rushed.
- Calculate how many doses you need. Trip duration × doses per day = vials needed. Don’t bring your entire supply. Bring what you need plus one extra dose as buffer.
- Reconstitute only what you’ll use. If your trip is 5 days and your vial lasts 28 days reconstituted, a partially used vial is fine. If you need a fresh reconstitution for the trip, do it now — not in the morning chaos.
- Label every vial clearly. Compound name, concentration, reconstitution date, expiry. If a label is faded or illegible, replace it now. TSA agents may ask what a vial contains — you need to be able to answer clearly and so does the label.
- Check vial condition. Inspect every vial you’re bringing: clear solution, intact septum, no particulates. Discard anything questionable now, not at the hotel.
- Freeze your cold pack. Put it in the freezer tonight. A cold pack frozen for 8+ hours stays cold far longer than one frozen for 2 hours the morning of departure.
- Charge documentation. If you have a prescription or doctor’s letter for any compound, locate it, photograph it (phone backup), and put the physical copy in your case or travel wallet.
- Confirm your case is packed and closed. Load vials into their designated slots. Confirm the case latches securely. Don’t leave this for the morning.
Pro Tip: Set a travel pack reminder in your phone for 8pm the night before every trip that involves peptides. The 5-minute prep the night before eliminates 95% of travel-day peptide stress.
What to Pack Checklist
Everything in this list should fit inside or alongside your hard-shell peptide case. If it doesn’t fit, your case is the wrong size for your protocol.
- Vials: Active reconstituted vials (in their assigned case slots) + any lyophilized backup powder vials for longer trips.
- BAC water: One small BAC water vial if you might need to reconstitute during the trip. Bacteriostatic water in a sealed, unopened vial travels fine.
- Syringes: Quantity = doses needed × 1.5 (buffer for drops, contamination, or extra doses). Insulin syringes (U-100, 28–31 gauge) for subcutaneous injections. Keep sealed in original packaging.
- Alcohol swabs: One per injection plus spares. Individual foil-wrapped swabs are compact and TSA-transparent.
- Sharps container: A travel-size sharps container (available at pharmacies, fits in a toiletry bag). Used syringes cannot go in hotel room trash in most jurisdictions — and certainly not in your bag.
- Cold pack: Sized for your transit time. Gel packs stay cold 8–12 hours; phase-change packs last 24–36 hours. Match to your door-to-fridge travel time, not just flight time.
- Doctor’s letter or prescription copy: For any prescribed compound. For research peptides, a personal-use statement with compound names and quantities is advisable for international travel.
- Insulating sleeve or small cooler bag: Wraps around your case to extend cold pack duration. Optional for domestic, useful for international.
Packing & Departure Checklist
The moment you’re packing your bags to leave:
- Peptide case goes in carry-on — always. Never in checked luggage. Cargo hold temperatures range from -20°C to +40°C depending on flight, season, and where your bag is loaded. Injectable peptides and NAD+ will not survive this.
- Case in an accessible location in your bag. You’ll need to pull it out at TSA. Don’t bury it under clothes.
- Cold pack loaded into the case or alongside it. Keep it in contact with vials, not loose in a side pocket.
- Syringes and swabs in a clear zip-lock pouch. TSA can see what’s in it. Opaque pouches invite more scrutiny.
- Sharps container separate and accessible. If TSA asks, you want to produce it quickly — not root through your bag.
- Don’t let vials touch ice or frozen cold packs directly. Direct contact with a frozen surface can cause localized freezing of reconstituted solution. Wrap cold packs in a thin cloth or use a case with foam insulation between vials and the cold source.
Airport & TSA Checklist
TSA rules on injectable medications and peptides are straightforward once you know them:
- Declare medications at the checkpoint. Tell the officer you have injectable medication and a cold pack before placing items on the belt. This is not legally required for domestic travel, but it dramatically reduces screening friction.
- Remove the case from your bag. Place it in a bin separately, like a laptop. The X-ray operator can see it clearly without opening your bag.
- Ice packs are allowed. TSA permits ice packs and gel packs for medications. They may be tested for explosives (a swab test that takes 30 seconds). Fully frozen packs pass; slushy or melted packs may be questioned.
- Syringes are allowed. TSA permits syringes for medical use. Having them in a clear pouch with your medication is the cleanest presentation.
- If asked what the compound is: Answer factually. "It’s a research peptide prescribed by my doctor" or "it’s a compounded medication" covers most cases. Having the doctor’s letter accessible means you can produce backup immediately if the conversation continues.
- Keep your case accessible throughout the flight. In the overhead bin directly above your seat, or under the seat in front of you. You don’t want to be hunting for it if you need to dose mid-flight or if the flight is delayed on the tarmac.
Pro Tip: TSA Pre® and Global Entry lanes move faster, which means less time on the belt and less handling of your case. If you travel more than 3–4 times a year with a peptide protocol, these programs pay for themselves in reduced screening stress alone.
Hotel Arrival Checklist
The transition from your cold case to a reliable fridge is the most critical moment of the whole trip. Don’t let it become an afterthought.
- Check the fridge immediately on arrival — before unpacking. Turn it to the coldest setting and place your case inside. Don’t wait until bedtime.
- Verify the fridge temperature. A small stick-on thermometer (available at any pharmacy for $5) placed in the fridge for 30 minutes gives you a real temperature reading. Most hotel mini-fridges run 4–10°C — the upper end is borderline for sensitive peptides.
- If no fridge, or fridge is inadequate: Call the front desk immediately. Request a room with a proper fridge, or ask for a medical-grade fridge if available. Some hotels have them. Alternatively, use your insulated case with ice from the ice machine as a temporary cold storage — wrap vials so they don’t touch ice directly, and refresh ice every 4–6 hours.
- Keep your case in the fridge — not loose vials. The case maintains the organization system and keeps vials in their labeled positions throughout the trip. Don’t unload into the fridge shelf.
- Dose at your normal protocol time. Don’t let travel disruption shift your dosing schedule significantly. If you normally dose at 10pm before bed, dose at 10pm local time — not "whenever you remember."
International Travel Checklist
International travel adds legal and logistical layers that domestic trips don’t require:
- Research your destination country’s rules before departure. Peptide legality varies significantly. Some countries classify research peptides as controlled substances; others have no restrictions. Look up the specific compound names you’re carrying and the import rules for your destination. This is non-negotiable research.
- Carry a translated prescription or compound description. For any country where you may face customs inspection, having the compound name in the local language on a printed document reduces the chance of misinterpretation. Many translation apps handle medical terminology adequately.
- Know local emergency contacts. Have the name and address of a clinic or pharmacy near your hotel in case you need additional supplies, a replacement cold pack, or BAC water. Look this up before you land, not after an emergency.
- Declare at customs if required. Many countries require declaration of injectable medications. Failing to declare when required is a much bigger problem than declaring a compound that turns out to be allowed.
- Personal-use quantities only. Customs authorities worldwide apply scrutiny proportional to quantity. Carrying 2–3 vials for personal use is categorically different from carrying 50 vials. Bring only what your protocol requires for the trip duration.
- Keep purchase receipts and documentation. Invoices from your peptide supplier showing personal purchase quantities, compound names, and pricing support a personal-use claim if questioned.
Return Trip Checklist
The return leg is where people get sloppy. The trip is almost over, vigilance drops. Don’t let your guard down on the way home:
- Declare at customs if returning to the US. US Customs and Border Protection requires declaration of items purchased abroad. Peptides acquired overseas should be declared — personal-use quantities of research compounds are generally admitted, but failing to declare is the mistake that creates problems.
- Keep receipts. If you purchased any peptides abroad (Mexico and Thailand are common destinations for this), have receipts accessible at customs.
- Personal-use quantities are the key threshold. Customs officers apply judgment based on quantity and context. Personal-use amounts with appropriate documentation clear without issue in the vast majority of cases.
- Cold chain on the return flight. Your vials need the same cold pack on the return as on the outbound leg. Refreeze your cold pack at the hotel the night before departure — same protocol as night one.
- Inventory on return. When you get home, check expiry dates on everything that’s been traveling. A vial that was fine when you left and has now been through 10 days of travel may be approaching its reconstituted shelf life. Dose through it promptly or discard.
Bottom Line: Every stage of this checklist — from freezing the cold pack the night before to verifying the hotel fridge on arrival to declaring at customs — is manageable when your vials are organized in a single, dedicated hard-shell case. The case is not just storage; it’s the operational unit that makes this entire checklist executable in practice. Get a case built for exactly this.